Introduction
Oh my goodness, friend, let me tell you about a little kitchen magic I stumbled upon! If you’re anything like me, navigating the low-carb or keto world can sometimes feel like saying goodbye to those simple, crunchy snacks you used to love. Popcorn? Forget about it… or so I thought! Until I discovered this absolute game-changer. This isn’t just a “substitute”; it’s a surprisingly delicious, crispy snack that truly satisfies that salty, crunchy craving. It’s so quick, so easy, and honestly, a little mind-blowing how simple ingredients can turn into something this delightful. Get ready to ditch the corn kernels because your new favorite keto “popcorn” is here!
Why You’ll Love This Recipe
- Fast: Seriously, we’re talking minutes from start to snack time!
- Easy: If you can use a microwave, you can make this. No fancy equipment needed.
- Giftable: Package these up in a cute jar with a ribbon for your low-carb pals!
- Crowd-Pleasing: Even non-keto friends will be reaching for a handful (just be prepared to share!).

Ingredients
Gather ’round, buttercups! Here’s what you’ll need for this cheesy transformation:
- 4 oz Provolone cheese: This is our star player! The key is using a natural, sliced provolone, not the processed kind, as it melts and puffs the best.
- ½ tbsp butter: Just a little bit to help our flavorings stick.
- ¾ tsp sweet corn extract: This is the secret ingredient that gives it that hint of corn flavor, making it surprisingly reminiscent of the real deal. You can find this online or in specialty baking stores.
- 1 ½ tbsp white cheddar cheese powder: Because cheese on cheese is always a good idea! This powder adds that tangy, savory cheddar punch that makes snack time irresistible.
How to Make It
Alright, let’s turn that cheese into magic! Follow these simple steps, and you’ll be crunching in no time.
1. First things first, you need to prep your cheese. Take your provolone and cut it into small cubes or just tear it into little pieces. Think about the size of a large corn kernel or maybe a little bigger. Smaller pieces tend to puff up more evenly, I find!
2. Next, grab a microwave-safe plate and line it with parchment paper. This is crucial! It prevents sticking and makes cleanup a breeze. Arrange your cheese pieces on the plate, making sure they have plenty of space around them. You absolutely do not want them touching, or they’ll just melt into a single puddle instead of puffing up.
3. Now for the fun part – the microwave! Pop the plate in and microwave on high for 1-3 minutes. This is where you need to become a hawk! Microwave strengths vary wildly, so start watching around the 1-minute mark. You’re looking for the cheese pieces to puff up and get crispy. They’ll expand and firm up as they cool slightly. If they start to brown too quickly, stop the microwave immediately! Better to under-microwave and do another 15-30 seconds than to burn them.
4. While your cheesy puffs are still piping hot from the microwave, quickly melt your butter. The residual heat from the cheese will help keep it warm too.
5. In a small bowl, whisk together the melted butter, the sweet corn extract (don’t skip this, it makes a difference!), and the white cheddar cheese powder.
6. Gently transfer your hot, crispy cheese pieces into the bowl with the flavoring mixture. Toss everything together carefully until each piece is nicely coated. The heat from the cheese helps the butter and powder adhere perfectly.
Let them cool for just a moment, then get ready to snack! They are best enjoyed right away for maximum crispiness.
Substitutions & Additions
Want to mix things up? Here are a few ideas:
- Different Cheese: While provolone works best because of its melting properties, some people have success with pre-sliced mozzarella or even thin slices of cheddar cut small. Experiment with small batches!
- Flavor Boosts: Swap the white cheddar powder for nutritional yeast (for a cheesy, dairy-free vibe), garlic powder, smoked paprika, or a little chili powder for heat.
- Skip the Extract: If you can’t find sweet corn extract, you can omit it. The snack will still be delicious, just without that subtle hint of corn flavor.

Tips for Success
- Watch that Microwave: Seriously, I can’t stress this enough! The difference between perfectly puffed and burnt crisps is seconds. Stay by the microwave and watch like a hawk, especially the first time you make it.
- Give Them Space: Don’t overcrowd the plate. Cook in batches if necessary so each piece has room to expand.
- Toss While Hot: The cheese needs to be hot when you toss it with the butter and powder so the flavoring sticks properly.
- Parchment is Your Friend: Don’t try this directly on a plate without parchment paper unless you enjoy scraping!
How to Store It
These are definitely best eaten fresh for that ultimate crunch factor. If you happen to have any leftovers (which is a rare occurrence in my house!), store them in an airtight container at room temperature. They might lose a little bit of their crispiness over time, but they’ll still be tasty. They typically last a day or two stored this way, though they rarely make it that long!
FAQs
Here are a few questions I often get about this fun snack:
Q: Can I use pre-shredded cheese?
A: I highly recommend against it for this recipe. Pre-shredded cheeses often contain anti-caking agents that prevent them from melting and puffing up correctly like sliced or block cheese will.
Q: Why didn’t mine puff up?
A: This usually comes down to the type of cheese (provolone works best!), not giving the pieces enough space on the plate, or not microwaving long enough. Make sure you’re using natural provolone and give each piece room to breathe!
Q: Is it exactly like popcorn?
A: Let’s be real, it’s cheese! But it has a surprisingly similar texture and satisfies that same craving for a light, crunchy, savory snack. The sweet corn extract really does help bridge the gap!
Q: Can I make a big batch in the oven?
A: This specific technique works best in the microwave for quick, individual puffing. Oven methods for cheese crisps usually result in flatter, cracker-like crisps, not these airy “popcorn” puffs.
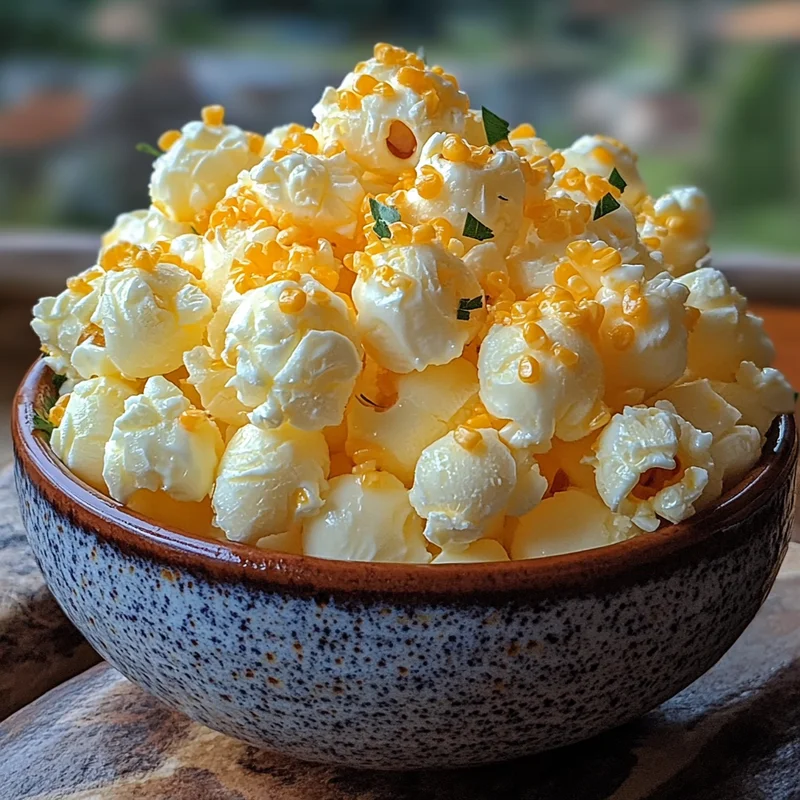
Viral Keto Popcorn: The Crispy Low-Carb Cheese Snack

A surprisingly simple and fast microwave snack made from provolone cheese that puffs up into airy, crispy bites, offering a low-carb alternative to popcorn.
- Prep Time: 5 minutes
- Cook Time: 3 minutes
- Total Time: 8 minutes
Ingredients
Ingredients
- 4 oz Provolone cheese (natural, sliced)
- 0.5 tbsp butter
- 0.75 tsp sweet corn extract
- 1.5 tbsp white cheddar cheese powder
Instructions
- Cut or tear the provolone cheese into small pieces, about the size of a large corn kernel.
- Line a microwave-safe plate with parchment paper and arrange the cheese pieces, ensuring they have plenty of space and are not touching.
- Microwave on high for 1-3 minutes, watching closely. The cheese pieces should puff up and become crispy. Stop immediately if they start to brown too quickly.
- While the cheese pieces are hot, melt the butter.
- In a small bowl, whisk together the melted butter, sweet corn extract, and white cheddar cheese powder.
- Gently transfer the hot, crispy cheese pieces into the bowl with the flavoring mixture and toss carefully until each piece is nicely coated.
- Let cool briefly and enjoy immediately for maximum crispiness.
Notes
Watch the microwave closely as times vary; pieces can go from perfect to burnt in seconds. Ensure cheese pieces have enough space on the plate so they don’t melt together. Toss the cheese while it is still hot so the flavoring mixture adheres properly. Using parchment paper is essential for preventing sticking. While provolone works best, some pre-sliced mozzarella or thin cheddar slices may work in small batches. Flavor boosts like nutritional yeast, garlic powder, smoked paprika, or chili powder can be used instead of or in addition to white cheddar powder. The sweet corn extract is optional but enhances the popcorn-like flavor. Avoid using pre-shredded cheese as it contains anti-caking agents that prevent proper puffing. Leftovers are best stored in an airtight container at room temperature but may lose some crispiness; they typically last a day or two. This method works best in the microwave for achieving the airy, puffed texture, unlike oven methods which yield flatter crisps.