Introduction
Oh my goodness, friends! Let’s talk bagels. There’s something so comforting, so utterly perfect, about sinking your teeth into a warm, chewy bagel, isn’t there? For the longest time, I thought making bagels at home was some kind of advanced baking wizardry, involving yeast, proofing, boiling, and all sorts of steps that felt a little intimidating for a lazy Sunday morning. Well, get ready for a little kitchen magic because these Healthy Greek Yogurt Bagels are here to change everything! Forget the fuss, forget the long wait. This recipe uses just FIVE simple ingredients you probably already have, and you can have warm, fluffy bagels ready in a flash. Seriously, you’re going to be hooked. It’s the perfect way to enjoy a little homemade goodness without spending all day in the kitchen.
Why You’ll Love This Recipe
- Fast: From mixing bowl to oven in minutes!
- Easy: So simple, even beginner bakers can nail it.
- Giftable: Wrap a warm batch up for a friend!
- Crowd-pleasing: Everyone loves a fresh bagel!

Ingredients
Gather ’round, sweet friends, let’s peek at what we need. The beauty of this recipe is how simple the ingredient list is!
- 1 Egg: This little guy is mostly for brushing on top before baking – it gives the bagels that beautiful shine and helps toppings stick. You’ll want to beat it lightly.
- 1 cup All-purpose flour: The base of our bagel dough! Simple and reliable all-purpose flour works perfectly here.
- 2 tsp Baking powder: Our leavening agent! Since we’re not using yeast, baking powder gives these bagels their lift and fluffy texture. Make sure yours is fresh!
- 1/4 tsp Salt: Just a pinch to balance the flavors and enhance the taste. Don’t skip it!
- 1 cup Greek yogurt: This is the star! It provides moisture, tang, and works with the baking powder to create that wonderful soft texture. Full-fat or 2% plain Greek yogurt works best for consistency.
How to Make It
Okay, deep breaths! You’ve got this. Making these bagels is ridiculously simple. Let’s walk through it together, step by happy step.
- First things first, preheat your oven to 375°F (190°C). Line a baking sheet with parchment paper. This prevents sticking and makes clean-up a breeze!
- In a medium bowl, whisk together your all-purpose flour, baking powder, and salt. Give it a good mix so everything is evenly distributed.
- Now, add the Greek yogurt to the dry ingredients.
- Using a fork or a spatula, start mixing everything together. It will look a little shaggy and crumbly at first, but keep going.
- Once it starts to come together, turn the dough out onto a lightly floured surface.
- Gently knead the dough for just about 1-2 minutes. Don’t overwork it! You just want to bring it together into a smooth, cohesive ball. It might be a little sticky, that’s okay.
- Divide the dough into 4 equal portions. (You can make more smaller bagels if you prefer, just adjust the baking time slightly).
- Take one portion and roll it into a rope about 6-7 inches long. Connect the ends to form a bagel shape, pinching them together tightly to seal. Repeat with the remaining dough portions.
- Place the shaped bagels on your prepared baking sheet.
- In a small bowl, lightly beat the egg. Brush the tops and sides of each bagel with the beaten egg. This gives them that lovely golden crust.
- Now’s the fun part! If you want toppings (everything bagel seasoning, sesame seeds, poppy seeds, etc.), sprinkle them generously over the egg-washed tops.
- Bake for 20-25 minutes, or until the bagels are puffed up, golden brown, and sound hollow when tapped on the bottom.
- Let them cool slightly on the baking sheet before slicing and enjoying! They are best warm.
Substitutions & Additions
Want to get creative? This simple dough is a fantastic canvas! Here are a few ideas:
- Flour Swap: While all-purpose works best for texture, you can try using part whole wheat flour, though you might need a tiny splash more yogurt. I haven’t tested gluten-free flours extensively with this specific ratio, so that might take some experimenting.
- Yogurt Swap: Full-fat plain Greek yogurt gives the best results. Other yogurts (like regular or flavored) have different consistencies and moisture levels, which could affect the dough. Stick to plain Greek for consistency!
- Sweet Bagels? Skip the salt in the dough, and add a tablespoon or two of sugar or maple syrup. Brush with egg wash and top with cinnamon sugar or a drizzle of honey post-baking.
- Savory Mix-Ins: Gently fold shredded cheese, chopped herbs (like chives or rosemary), or minced garlic into the dough after kneading. Yum!
- Topping Time: The possibilities are endless! Everything bagel seasoning is a classic. Poppy seeds, sesame seeds, dried minced onion, dried garlic flakes, flaky sea salt, or even a sprinkle of parmesan cheese work wonderfully.
Tips for Success
Even though this recipe is easy, a couple of pointers can make sure your bagels turn out absolutely perfect:
- Don’t Over-Knead: This isn’t like yeast dough. Too much kneading with this kind of dough can make the bagels tough. Just mix until it comes together and knead briefly until smooth.
- Flour Sparingly: Use just enough flour on your surface and hands to prevent sticking. Too much flour can make the dough dry.
- Seal the Ring: When you form the bagel shape, make sure you really pinch those ends together well. Otherwise, they might separate a little during baking.
- Fresh Baking Powder: Seriously, check the date! Old baking powder won’t give you the lift you need, and your bagels will be flat.
- Prep Ahead: You can mix the dough, shape the bagels, and place them on the baking sheet. Cover them loosely with plastic wrap and pop them in the fridge for a few hours (or even overnight) before adding the egg wash and baking. Just know they might not rise quite as much.
How to Store It
These bagels are definitely best enjoyed fresh and warm from the oven! However, if you happen to have any leftovers (a rare occurrence in my house!), here’s how to keep them:
- Store cooled bagels in an airtight container or a zip-top bag at room temperature for up to 2 days.
- For longer storage, you can slice cooled bagels and freeze them in a freezer-safe bag for up to 2-3 months. Toast them directly from the freezer for a quick breakfast!
- To reheat a refrigerated bagel, you can slice and toast it, or warm it in the microwave for 15-30 seconds.
FAQs
Got questions? I’ve got answers!
Are these bagels chewy like traditional bagels?
They have a lovely chew, but it’s slightly different from a traditional boiled and baked bagel. They are wonderfully soft and fluffy on the inside!
Can I use non-fat Greek yogurt?
You can, but it tends to be thinner and might result in a slightly drier dough or a less rich texture. I find 2% or full-fat works best.
Why did my bagels flatten out?
This could be due to old baking powder, over-kneading the dough, or potentially using a yogurt that was too thin/watery. Ensure your baking powder is fresh and handle the dough gently!
Can I add cheese inside the dough?
Absolutely! Gently fold in about 1/4 to 1/2 cup of shredded cheese (like cheddar or mozzarella) after you’ve finished kneading the basic dough.
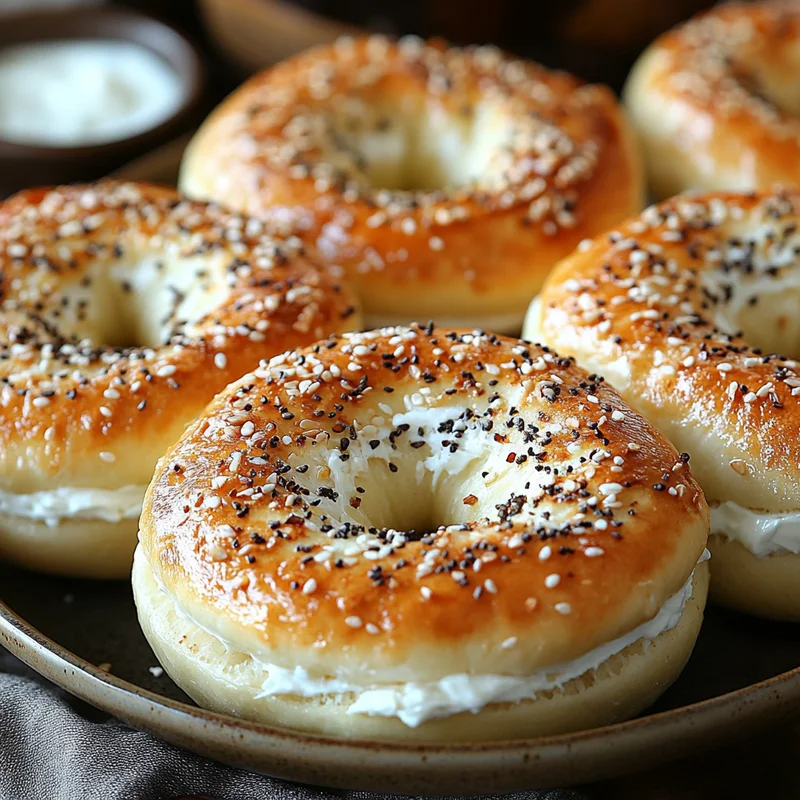
PrintFluffy, Healthy Greek Yogurt Bagels (Just 5 Ingredients!)

A simple recipe for homemade bagels using Greek yogurt instead of yeast, requiring only five ingredients and minimal time. They are described as warm, chewy, soft, and fluffy.
- Cook Time: 20 minutes
- Total Time: 20 minutes
- Yield: 4
Ingredients
Hauptzutaten
- 1 Egg (for brushing on top, lightly beaten)
- 1 cup All-purpose flour
- 2 tsp Baking powder (make sure yours is fresh)
- 0.25 tsp Salt
- 1 cup Greek yogurt (full-fat or 2% plain works best)
Instructions
- First things first, preheat your oven to 375°F (190°C). Line a baking sheet with parchment paper. This prevents sticking and makes clean-up a breeze!
- In a medium bowl, whisk together your all-purpose flour, baking powder, and salt. Give it a good mix so everything is evenly distributed.
- Now, add the Greek yogurt to the dry ingredients.
- Using a fork or a spatula, start mixing everything together. It will look a little shaggy and crumbly at first, but keep going.
- Once it starts to come together, turn the dough out onto a lightly floured surface.
- Gently knead the dough for just about 1-2 minutes. Don’t overwork it! You just want to bring it together into a smooth, cohesive ball. It might be a little sticky, that’s okay.
- Divide the dough into 4 equal portions. (You can make more smaller bagels if you prefer, just adjust the baking time slightly).
- Take one portion and roll it into a rope about 6-7 inches long. Connect the ends to form a bagel shape, pinching them together tightly to seal. Repeat with the remaining dough portions.
- Place the shaped bagels on your prepared baking sheet.
- In a small bowl, lightly beat the egg. Brush the tops and sides of each bagel with the beaten egg. This gives them that lovely golden crust.
- Now’s the fun part! If you want toppings (everything bagel seasoning, sesame seeds, poppy seeds, etc.), sprinkle them generously over the egg-washed tops.
- Bake for 20-25 minutes, or until the bagels are puffed up, golden brown, and sound hollow when tapped on the bottom.
- Let them cool slightly on the baking sheet before slicing and enjoying! They are best warm.
Notes
Tips for Success:
– Don’t Over-Knead: Just mix until it comes together and knead briefly until smooth.
– Flour Sparingly: Use just enough flour on your surface and hands to prevent sticking.
– Seal the Ring: Pinch the ends together well when forming the bagel shape.
– Fresh Baking Powder: Old baking powder won’t give you the needed lift.
– Prep Ahead: Dough can be mixed, shaped, and refrigerated for a few hours or overnight before baking.
Storage:
– Store cooled bagels in an airtight container at room temperature for up to 2 days.
– For longer storage, slice cooled bagels and freeze in a freezer-safe bag for up to 2-3 months.
– Reheat refrigerated bagels by toasting or microwaving.