Introduction
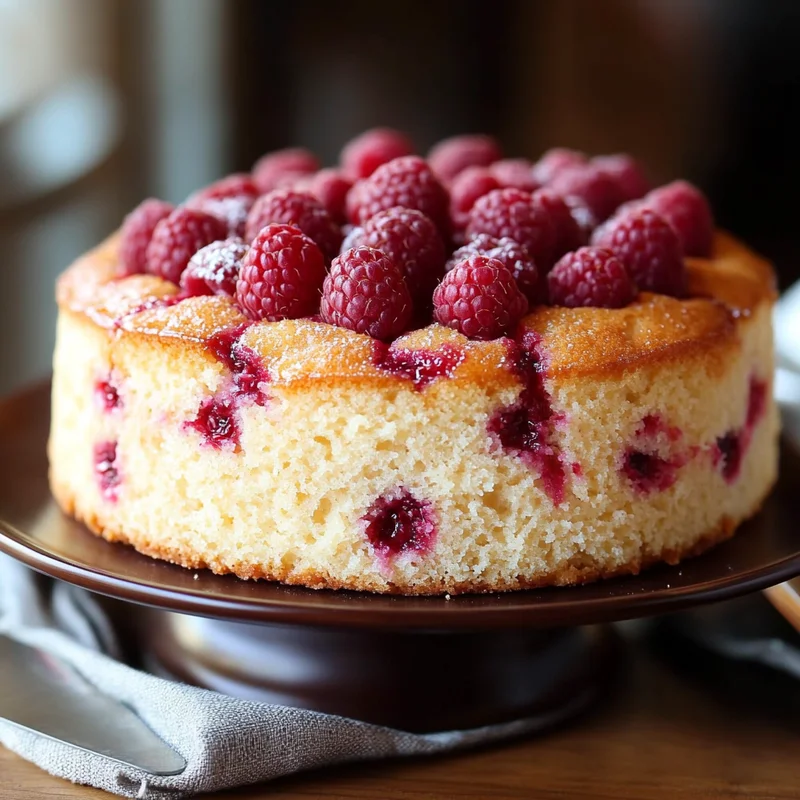
Hey baking buddies! You know those days? The ones where the week feels long, dinner is done, and you just crave a little something sweet, a little comfort, something that smells amazing coming out of the oven? But who has the energy for a complicated dessert on a Tuesday night? Not me! And that’s exactly why this Weekday Raspberry Cake is an absolute game-changer in my kitchen. It’s the kind of recipe that feels like a warm hug, simple yet utterly delightful. It’s ridiculously easy to whip up, uses simple ingredients you probably have on hand, and delivers a moist, tender cake bursting with bright raspberry flavor. Seriously, you can have this mixed up and in the oven in under 15 minutes. Perfect for a last-minute treat or just because you deserve it!
Why You’ll Love This Recipe
Why is this my go-to when I need a little baking therapy without the fuss? Let me count the ways:
- Fast: From start to oven, we’re talking minutes. Seriously speedy!
- Easy: No fancy techniques here, just simple mixing steps perfect for beginners or experienced bakers on autopilot.
- Giftable: Makes a lovely little treat to share with a neighbor or bring to a casual gathering (if it lasts that long!).
- Crowd-Pleasing: Everyone loves a simple, delicious cake, and the sweet-tart raspberries are always a hit.

Ingredients
Gather ’round, friends! Here’s what you’ll need to make this magic happen. Nothing complicated, I promise.
- 1 ½ cups all purpose flour: Just your standard flour will do the trick. It’s the base of our lovely cake structure!
- 1 cup granulated sugar: Provides that perfect amount of sweetness to balance the tart raspberries.
- 2 teaspoons baking powder: Our leavening agent! This helps the cake rise up light and fluffy.
- ¼ teaspoon table salt: A little pinch to enhance all the flavors and balance the sweetness. Don’t skip it!
- 3 large eggs: These bind everything together and add richness. Try to use large eggs for consistency!
- 1 ½ cups cottage cheese: Okay, okay, stay with me here! This is the SECRET ingredient for incredible moisture. I know it sounds weird, but trust me, you won’t taste the cheese. It just makes the cake unbelievably tender and moist. Use full-fat for the best results, but reduced-fat works too.
- 1 teaspoon vanilla extract: Pure vanilla adds that classic, comforting flavor that makes cakes feel complete.
- ½ cup salted butter, melted: Melting the butter is a shortcut here – no need to wait for it to soften! Salted butter adds an extra little flavor boost, but unsalted with a pinch more salt works too.
- 1 cup fresh raspberries, divided: The star of the show! Fresh is best here for their shape and flavor, but I’ll give you tips on using frozen below. “Divided” means we’ll use some in the batter and some sprinkled on top for maximum berry power.
How to Make It
Alright, let’s get baking! Follow these super simple steps, and you’ll have a delicious cake in no time.
- First things first, let’s get prepped. Preheat your oven to 350°F (175°C). Grab an 8×8 inch square baking pan or a 9-inch round cake pan. Give it a good spray with non-stick cooking spray or grease it with butter and flour it. This makes sure your beautiful cake comes out easily!
- In a medium bowl, whisk together the dry ingredients: the flour, granulated sugar, baking powder, and salt. Just a quick whisk to make sure everything is combined and the leavening is evenly distributed.
- In a separate, larger bowl, whisk together the wet ingredients: the three eggs, the cottage cheese (yes, all of it!), and the vanilla extract. Whisk well until everything is pretty smooth. Don’t worry if there are tiny little curds from the cottage cheese, they disappear when baked!
- Pour the dry ingredients into the bowl with the wet ingredients. Add the melted butter. Now, gently mix everything together with a spoon or spatula just until just combined. Don’t overmix! A few small lumps of flour are totally okay.
- Now for the raspberries! Gently fold about ¾ cup of the fresh raspberries into the batter. Be gentle so you don’t totally smash them.
- Pour the batter into your prepared baking pan and spread it out evenly. Sprinkle the remaining ¼ cup of raspberries over the top of the batter.
- Pop the pan into your preheated oven. Bake for 35-45 minutes, or until a toothpick inserted into the center of the cake comes out clean. The cake should be golden brown around the edges.
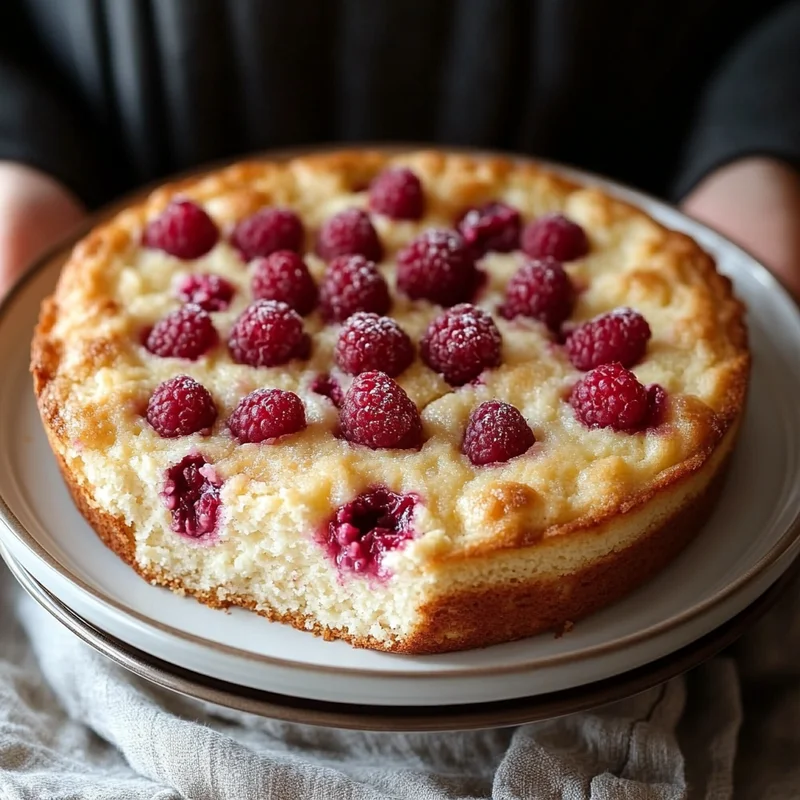
- Let the cake cool in the pan for about 10-15 minutes before slicing and serving. This helps it set up nicely. You can serve it warm, at room temperature, plain, or with a dollop of whipped cream or a scoop of vanilla ice cream!
Substitutions & Additions
Want to mix things up? This recipe is super forgiving and a great base for your own creativity!
- Other Berries: Swap out the raspberries for blueberries, blackberries, or a mix of your favorite berries. Frozen berries work too, just toss them in a tablespoon of flour before folding into the batter to help prevent them from sinking.
- Lemon Zest: Add the zest of one lemon to the wet ingredients for a bright, citrusy kick that pairs beautifully with raspberries.
- Almond Extract: Use ½ teaspoon of almond extract instead of or in addition to the vanilla extract for a different flavor profile.
- Chocolate Chips: Raspberry and chocolate are a classic combo! Fold in a handful (about ½ cup) of white or semi-sweet chocolate chips with the raspberries.
- Different Fat: You could try substituting the melted butter with an equal amount of a neutral oil like vegetable or canola oil for a slightly different texture, though I love the flavor butter adds!
Tips for Success
Just a few little pointers to make sure your cake turns out perfectly every time!
- Don’t Overmix: Overmixing the batter develops the gluten in the flour too much, which can lead to a tough cake. Mix just until the dry and wet ingredients are combined.
- Measure Flour Correctly: Spoon the flour into your measuring cup and level it off with a straight edge, rather than scooping directly from the bag. This prevents packing too much flour into the cup, which can make your cake dry.
- Use Room Temperature Ingredients (If You Can): While this recipe is forgiving, using eggs and cottage cheese that are closer to room temperature helps them incorporate more smoothly into the batter.
- Berries: If using fresh raspberries, try not to overhandle them as they are delicate. If using frozen, remember to toss them in flour!
- Cooling Time: Let the cake cool in the pan for the recommended time. Cutting into it too soon can cause it to crumble a bit.
How to Store It
If you happen to have any leftovers (a big IF!), here’s how to keep them fresh.
- Store the cooled cake in an airtight container at room temperature for up to 2-3 days.
- For longer storage, you can store it in the refrigerator for up to 5 days.
- This cake also freezes beautifully! Once completely cooled, wrap individual slices or the whole cake tightly in plastic wrap, then in foil, or place in a freezer-safe container. It will keep in the freezer for up to 2-3 months. Thaw slices at room temperature or warm gently before serving.
FAQs
Got questions? I’ve got answers!
- Q: Will this cake really not taste like cottage cheese? A: Nope, it absolutely won’t! The cottage cheese blends in during baking and simply provides moisture and tenderness without any cheesy flavor. It’s my secret weapon for moist cakes!
- Q: Can I use frozen raspberries instead of fresh? A: Yes, you can! Toss the frozen berries (no need to thaw) in about 1 tablespoon of all-purpose flour before gently folding them into the batter and sprinkling on top. This helps prevent them from sinking to the bottom of the cake.
- Q: Can I make this cake ahead of time? A: Absolutely! This cake keeps well at room temperature for a couple of days. It’s a great make-ahead option for a weekend treat or weeknight dessert.
- Q: What size pan is best? A: An 8×8 inch square pan or a 9-inch round pan works perfectly for this recipe. Using a different size might affect the baking time, so keep an eye on it if you swap pans.