Introduction
Oh my goodness, sometimes the simplest things bring the most joy, right? Like sunshine on your face, the smell of freshly cut grass, or a jar of vibrant, crunchy pickled vegetables straight from your fridge! This recipe for easy refrigerator pickles is one of those simple joys. Forget complicated canning or special equipment – if you can boil water and chop a veggie, you can make these. They are ridiculously quick, totally customizable, and seriously addictive. You’re going to want a batch of these on hand always, I promise!
Why You’ll Love This Recipe
- Fast
- Easy
- Giftable
- Crowd-pleasing

Ingredients
Gather ’round, friends! Here’s what you’ll need to whip up a batch of these delightful refrigerator pickles. Think of this as your starting point – you can totally play around with the veggies!
1 cup Carrots: Sweet, crunchy, and they add such a pretty color! Cut them into little coins, sticks, or whatever bite-sized shape makes you happy.
2 cups Cauliflower florets: These soak up that tangy brine beautifully. Just break them into small, snackable florets.
1 cup Cucumbers: A classic for a reason! Use small Kirby cukes or regular ones, sliced or cut into spears. So refreshing!
3 cloves Garlic: Don’t be shy with the garlic! Peeled whole cloves add a lovely mellow garlicky flavor to the brine as they sit.
1 cup Green beans: Trimmed and maybe halved if they’re super long. They keep a nice snap.
1 Red bell pepper: Adds sweetness and another pop of color. Strips or chunks work great here.
2 tsp Mustard seeds: Essential for that classic pickle flavor! Both yellow or brown work.
1 tsp Black peppercorns: A little bit of spice and warmth.
1/2 tsp Red pepper flakes (optional): If you like a little kick, definitely add these in!
2 tbsp Salt: Regular table salt is fine, but pickling or kosher salt is even better as it dissolves easily.
1 tbsp Sugar: Just a touch to balance the acidity of the vinegar.
2 cups White vinegar: The tangy base of our brine! Standard distilled white vinegar (5% acidity) is perfect.
2 cups Water: To dilute the vinegar and salt.
How to Make It
Okay, let’s turn these simple ingredients into pickle perfection! Get ready, because this is seriously easy.
First things first, you need to get your veggies ready. Wash everything well. Now, grab your knife and cutting board and start chopping! Cut the carrots, cucumbers, and bell pepper into bite-sized pieces. Break the cauliflower into nice, snackable florets. Trim the ends off the green beans, and if they’re really long, snap or cut them in half. Don’t forget to peel those garlic cloves.
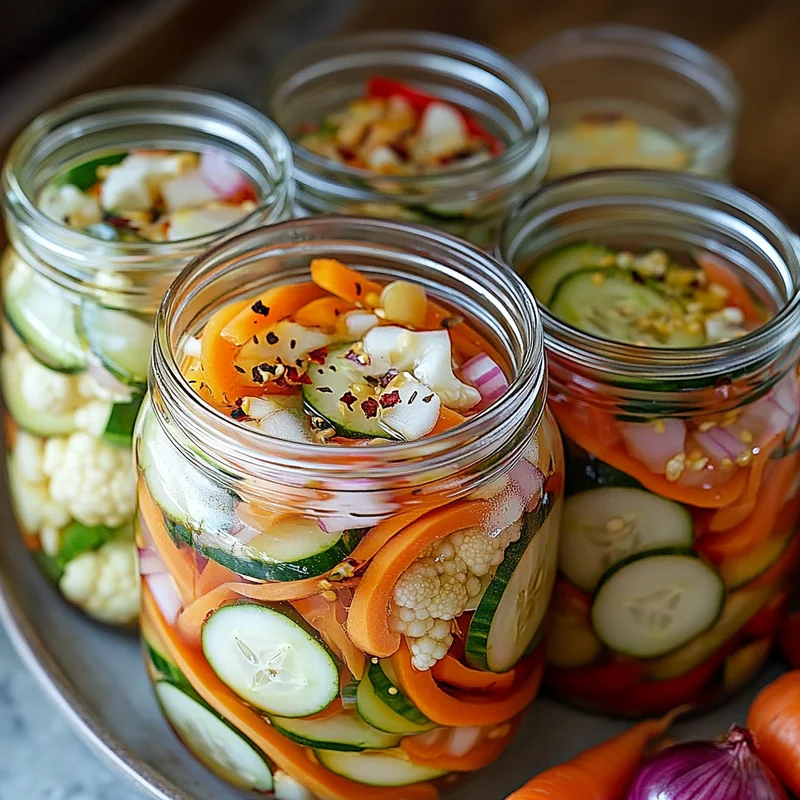
Next, you’ll want to pack your clean jars. I like to use quart-sized mason jars, but any clean jar with a tight-fitting lid will do. Start adding your prepared vegetables, garlic cloves, mustard seeds, black peppercorns, and red pepper flakes (if you’re using them). Pack them in relatively snugly, but don’t cram them so tight you can’t get the brine in! Leave a little space at the top, maybe an inch or so.
Now, let’s make the magical brine! Grab a medium saucepan and combine the water, white vinegar, salt, and sugar. Pop it onto your stove over medium-high heat. Give it a good stir. You want to heat it up just until the salt and sugar are completely dissolved. You don’t need a rolling boil, just bring it to a gentle simmer where you see a few bubbles starting to form.
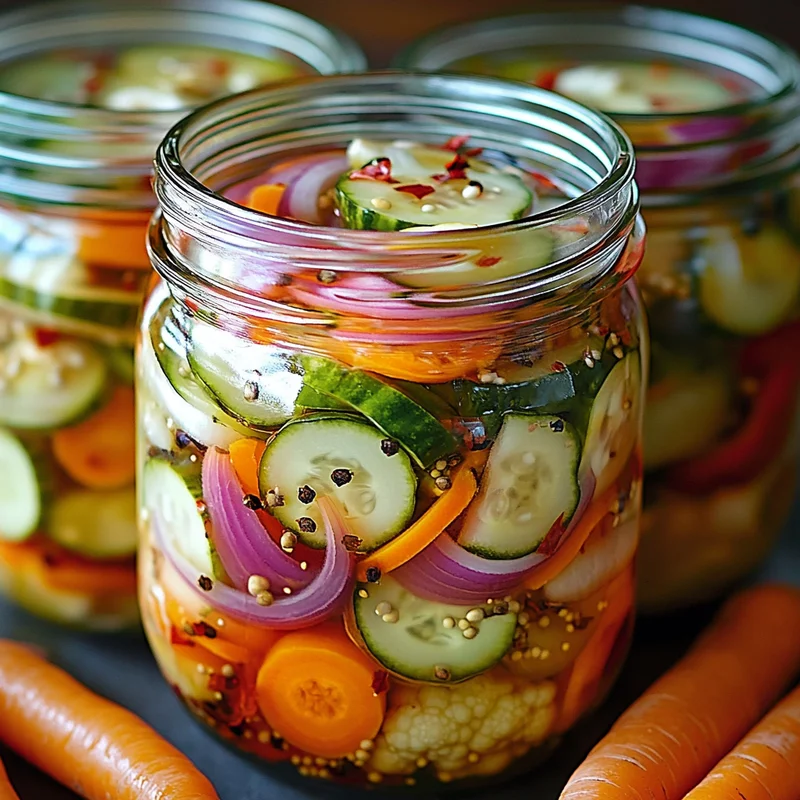
Time for the pour! Carefully take your hot brine and pour it over the vegetables in each jar. Make sure you cover all the veggies completely with that lovely liquid. Try to leave about 1/2 inch of empty space between the top of the liquid and the rim of the jar. This is called headspace.
Almost there! Wipe off the rims of your jars with a clean cloth if any brine spilled. Place the lids on the jars and screw on the bands. Tighten them just until they’re “fingertip tight” – snug, but not so tight you’re straining. Now, just let those beautiful jars sit out on the counter and cool down completely to room temperature. It might take a couple of hours.
Once they’re cool, pop those jars into the refrigerator! This is where the magic really happens. The flavors need time to meld and the veggies need to soak up that tangy goodness. For the absolute best flavor and crunch, let them chill out in the fridge for at least 24 hours before you dive in. I find they get even better after a few days!
Substitutions & Additions
The beauty of refrigerator pickles is how adaptable they are! Feel free to swap things out based on what you have or what you love.
- Try different vegetables! Radishes, sliced onions, snap peas, cherry tomatoes, broccoli florets, or even hard-boiled eggs are great additions.
- Get creative with the spices! Add dill sprigs, bay leaves, coriander seeds, celery seed, a pinch of turmeric for color, or even a small dried chili pepper for extra heat.
- Want a slightly different flavor? You could experiment with apple cider vinegar instead of white vinegar, although the color will be different.
Tips for Success
Making these is pretty foolproof, but here are a few things I’ve learned along the way to make them extra amazing:
- Use fresh, crisp veggies: Limp vegetables won’t give you that satisfying crunch.
- Cut uniformly: Try to cut your veggies into roughly similar sizes so they pickle evenly.
- Don’t skip the cooling step: Letting the jars cool before refrigerating is important for food safety and the pickling process.
- Pack them in tight: The more veggies you can fit (without squishing them), the more pickle goodness you get per jar! But remember to leave that headspace.
- Be patient: While you can eat them after a few hours, letting them sit for 24 hours or more in the fridge really develops the flavor.
How to Store It
These are refrigerator pickles, which means they need to be stored in the fridge! Once they’ve cooled and you’ve put them in the refrigerator, they will stay wonderfully crisp and delicious for several weeks. I’ve had batches last up to a month (if they aren’t devoured first!). Always make sure the veggies are submerged in the brine for best results and longevity.
FAQs
Got questions? Let’s tackle a couple of common ones!
Can I use other types of vinegar?
Yes, you can! White vinegar gives the cleanest, most classic pickle flavor and keeps the color of the veggies bright. Apple cider vinegar will work but will give a slightly different flavor profile and may cloud the brine. Just make sure the vinegar you use has at least 5% acidity.
How long do they need to pickle before eating?
Technically, you can nibble on them after just a few hours once they’re chilled. However, they really hit their prime flavor after at least 24 hours in the refrigerator. I think they are perfect after 2-3 days!
Why are my pickles not crunchy?
This can happen if your vegetables weren’t super fresh to begin with, or if you didn’t pack the jars tightly enough allowing the veggies to float around too much. Also, make sure your brine wasn’t boiling rapidly when you poured it in – just a gentle simmer is needed.
Do I need to sterilize the jars?
For refrigerator pickles, full sterilization like you would for canning isn’t strictly necessary since they aren’t shelf-stable and are stored in the fridge. However, using very clean jars and lids is always a good practice to prevent any off-flavors or spoilage.
PrintEasy Refrigerator Pickled Vegetables

This recipe for easy refrigerator pickles is a quick, customizable, and addictive snack that requires no complicated canning or special equipment, just boiling water and chopping veggies.
- Cook Time: 5 minutes
- Total Time: 5 minutes
Ingredients
Vegetables
- 1 cup Carrots (cut into bite-sized shape)
- 2 cups Cauliflower florets (broken into small, snackable florets)
- 1 cup Cucumbers (sliced or cut into spears)
- 3 Garlic cloves (peeled whole)
- 1 cup Green beans (trimmed and maybe halved)
- 1 Red bell pepper (cut into strips or chunks)
Spices
- 2 tsp Mustard seeds (yellow or brown)
- 1 tsp Black peppercorns
- 0.5 tsp Red pepper flakes (optional)
Brine
- 2 tbsp Salt (regular, pickling or kosher salt)
- 1 tbsp Sugar
- 2 cups White vinegar (standard distilled (5% acidity))
- 2 cups Water
Instructions
- Get your veggies ready. Wash everything well. Now, grab your knife and cutting board and start chopping! Cut the carrots, cucumbers, and bell pepper into bite-sized pieces. Break the cauliflower into nice, snackable florets. Trim the ends off the green beans, and if they’re really long, snap or cut them in half. Don’t forget to peel those garlic cloves.
- Next, you’ll want to pack your clean jars. I like to use quart-sized mason jars, but any clean jar with a tight-fitting lid will do. Start adding your prepared vegetables, garlic cloves, mustard seeds, black peppercorns, and red pepper flakes (if you’re using them). Pack them in relatively snugly, but don’t cram them so tight you can’t get the brine in! Leave a little space at the top, maybe an inch or so.
- Now, let’s make the magical brine! Grab a medium saucepan and combine the water, white vinegar, salt, and sugar. Pop it onto your stove over medium-high heat. Give it a good stir. You want to heat it up just until the salt and sugar are completely dissolved. You don’t need a rolling boil, just bring it to a gentle simmer where you see a few bubbles starting to form.
- Time for the pour! Carefully take your hot brine and pour it over the vegetables in each jar. Make sure you cover all the veggies completely with that lovely liquid. Try to leave about 1/2 inch of empty space between the top of the liquid and the rim of the jar. This is called headspace.
- Almost there! Wipe off the rims of your jars with a clean cloth if any brine spilled. Place the lids on the jars and screw on the bands. Tighten them just until they’re “fingertip tight” – snug, but not so tight you’re straining. Now, just let those beautiful jars sit out on the counter and cool down completely to room temperature. It might take a couple of hours.
- Once they’re cool, pop those jars into the refrigerator! This is where the magic really happens. The flavors need time to meld and the veggies need to soak up that tangy goodness. For the absolute best flavor and crunch, let them chill out in the fridge for at least 24 hours before you dive in. I find they get even better after a few days!
Notes
Making these is pretty foolproof, but here are a few things I’ve learned along the way to make them extra amazing: Use fresh, crisp veggies; Cut uniformly; Don’t skip the cooling step; Pack them in tight; Be patient. These are refrigerator pickles, which means they need to be stored in the fridge! They will stay wonderfully crisp and delicious for several weeks, up to a month. Always make sure the veggies are submerged in the brine for best results and longevity.