Introduction
Oh, friends. Some desserts just have a way of transporting you, don’t they? Like a warm hug in a bite, reminding you of simpler times, maybe grandma’s kitchen, or a potluck where that one amazing dish always disappeared first. Well, get ready, because these Gooey Butter Cake Bars are that kind of treat. They’re a true classic, straight out of St. Louis tradition, but made so incredibly simple that anyone, anywhere, can whip up a batch.
Seriously, if you’ve never had these before, prepare to be amazed. And if you have, get ready for the easiest, most fail-proof way to make them at home. They’re quick, they use simple ingredients, and they deliver big, bold, buttery, gooey flavor. Let’s bake some happiness!
Why You’ll Love This Recipe
These aren’t just any bars; they’re special. Here’s why they’re about to become your new go-to:
- Fast: Minimal prep time means you’re just minutes away from oven-ready goodness.
- Easy: We’re talking semi-homemade magic here! Using a cake mix simplifies things beautifully.
- Giftable: Pack these up for friends, neighbors, or holiday parties. They travel well and are always a hit.
- Crowd-Pleasing: The combination of a buttery cake base and a sweet, creamy, gooey top is universally loved. Prepare for rave reviews!

Ingredients
Gather ’round! You likely have most of these staples in your pantry and fridge right now. Here’s what you’ll need:
- 1 box (about 15.25 oz) yellow cake mix: This is our shortcut superhero! While yellow is classic, feel free to experiment later.
- 1/2 cup (1 stick) unsalted butter, melted: Butter makes everything better, right? Melting it helps form our simple, press-in crust.
- 1 large egg (for the base): Just one little egg to bind our cake mix base together.
- 8 oz block cream cheese, softened: Make sure this is truly softened to room temperature! It makes beating it smooth so much easier. Don’t use the whipped kind.
- 2 large eggs (for the filling): These add richness and help the gooey layer set just right.
- 4 cups powdered sugar: Also known as confectioners’ sugar. This is what gives our filling its signature sweetness and helps create that glorious, slightly crackled top.
How to Make It
Okay, let’s get this buttery, gooey party started! Follow these simple steps, and you’ll have warm, delicious bars in no time.
- First things first, let’s get the oven ready. Preheat your oven to 350°F (175°C). Grab a 9×13 inch baking pan – a standard glass or metal one works great – and give it a good grease. You can use cooking spray or a little butter and flour. This step is crucial so your bars don’t stick!
- Now, let’s make the base! In a medium bowl, dump in the dry yellow cake mix. Pour in the glorious melted butter and crack in that first large egg. Grab a spoon or a sturdy spatula and mix it all together until it’s just combined. Don’t overmix! It’s going to be a pretty thick, almost dough-like mixture.
- Take that thick mixture and press it evenly into the bottom of your prepared 9×13 inch pan. I like to use the back of a spoon or even my clean hands (lightly floured if it’s sticky) to make sure it’s a nice, even layer from edge to edge. This is your delicious, buttery crust!
- Now for the star: the gooey filling! In a separate, larger bowl, add your softened cream cheese. Beat it with an electric mixer (or a whisk and some arm power!) until it’s super smooth and creamy, with no lumps.
- Add the two large eggs to the cream cheese and beat again until they are just combined.
- Gradually add the powdered sugar, one cup at a time, beating on low speed at first so you don’t create a sugar cloud in your kitchen! Once it’s incorporated, you can turn the speed up slightly and beat until the mixture is completely smooth and wonderfully creamy. It will be thick but pourable.
- Carefully pour this luscious cream cheese mixture right over the cake base you pressed into the pan. Use a spatula to gently spread it out evenly, making sure it covers the base all the way to the edges.
- Pop the pan into your preheated oven. Bake for 30-40 minutes. How do you know they’re done? The edges will look lightly golden brown, and the center should look set but still have a slight wobble or softness to it. It will firm up more as it cools. Don’t wait for the center to be completely solid like a cake – that gooeyness is what we’re after!
- This is the hardest part: letting them cool! You absolutely MUST let these cool completely in the pan before you even think about cutting into them. As they cool, the gooey center sets up just enough to hold its shape when cut. Patience, my friend, patience! It might take a couple of hours.
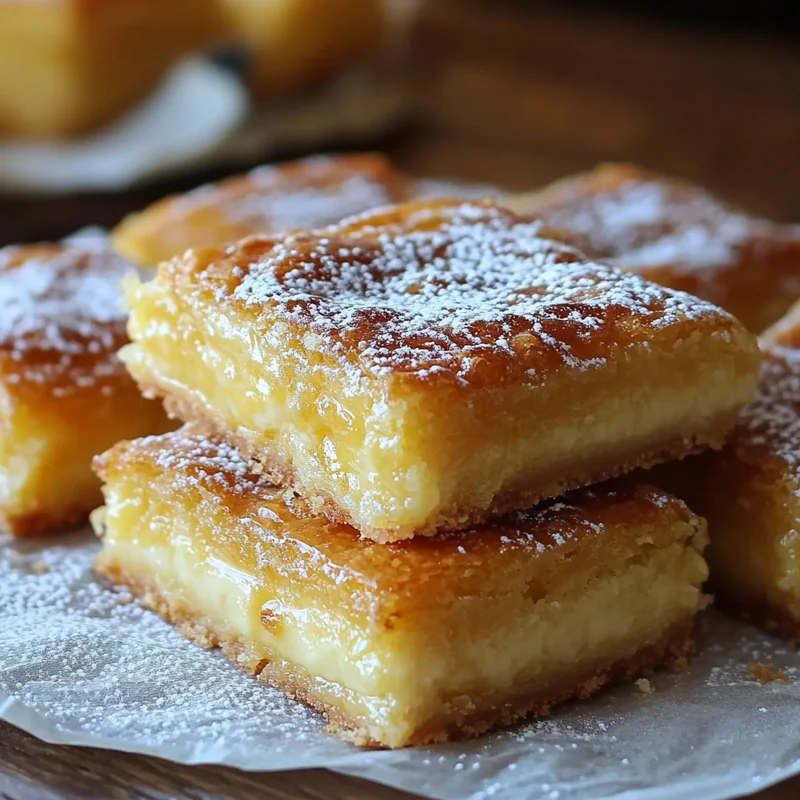
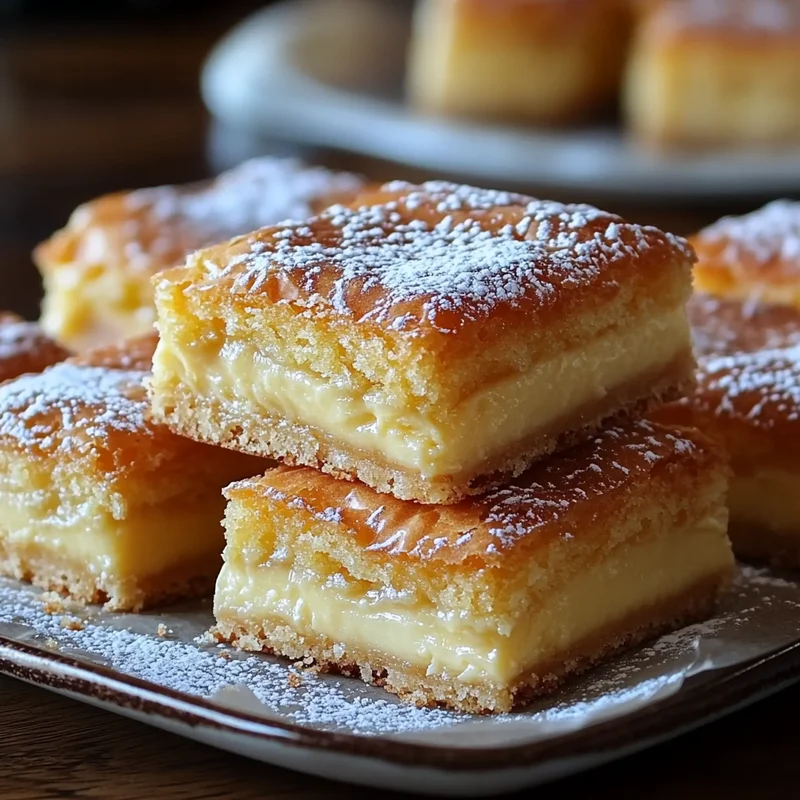
- Once fully cooled, use a sharp knife to cut them into squares or bars. Dust with a little extra powdered sugar if you like, and get ready to enjoy a little piece of heaven!
Substitutions & Additions
This classic recipe is perfect as is, but feel free to get creative! Here are a few ideas:
- Change the Cake Mix: Lemon, chocolate, strawberry, spice, or even a funfetti cake mix can totally change the flavor profile.
- Add Extracts: A teaspoon of vanilla extract in the filling is always welcome, or try almond extract for a different twist.
- Mix-Ins: Swirl in some raspberry jam, chocolate chips, chopped nuts, or even a sprinkle of cinnamon into the cream cheese layer before baking.
- Top It Off: Drizzle with melted chocolate, caramel sauce, or a simple glaze after cooling.
Tips for Success
Want to make sure your Gooey Butter Bars turn out perfect every single time? Keep these tips in mind:
- Soften the Cream Cheese: I can’t stress this enough! Cold cream cheese leads to lumps, and you want that filling silky smooth. Let it sit on the counter for at least an hour, or gently warm it in the microwave for a few seconds (be careful not to melt it!).
- Don’t Overmix the Base: Just mix the cake mix, butter, and egg until just combined. Overmixing can make the base tough.
- Grease That Pan Well: Seriously. These are gooey, and they love to stick. A well-greased pan is your best friend for easy cutting and serving.
- Don’t Overbake: Remember, the center should still look a little soft and jiggly when you take it out. The residual heat and cooling time will finish setting it. Overbaking leads to less gooeyness!
- Cool Completely: I know, I know, it’s tempting! But cutting into warm gooey bars results in a delicious, but messy pile. Letting them cool gives that gooey layer a chance to firm up enough to slice cleanly.
How to Store It
Assuming you have any left (a big assumption!), here’s how to keep your Gooey Butter Cake Bars fresh:
Store cooled bars in an airtight container at room temperature for 2-3 days. For longer storage, you can keep them in the refrigerator for up to a week. If you prefer them slightly warm and extra gooey, you can pop a bar in the microwave for a few seconds!
You can also freeze these! Cut into bars, wrap individually or place in a single layer in a freezer-safe container with parchment paper between layers. Freeze for up to 2-3 months. Thaw at room temperature or in the fridge.
FAQs
Why is my gooey layer not setting up?
Most likely, it needed a few more minutes in the oven or, more commonly, wasn’t allowed to cool completely. Make sure the edges are golden and the center is mostly set (though still soft) when it comes out of the oven, and then let it cool fully before cutting.
Can I use salted butter?
Yes, you can, but unsalted butter is preferred for baking as it gives you more control over the saltiness. If you use salted butter, you might omit any additional salt you’d usually add to recipes, though this recipe doesn’t call for any extra salt, so it should be fine.
Can I make this in a different size pan?
A 9×13 inch pan is standard for this amount. If you use a smaller pan, the bars will be thicker and may need a longer baking time. A larger pan will make thinner bars and require less time. Keep an eye on the edges and center.
Can I use a different kind of cake mix?
Absolutely! While yellow is classic, experiment with different flavors like lemon, chocolate, or spice cake mixes for fun variations.
PrintEasy Classic Gooey Butter Cake Bars
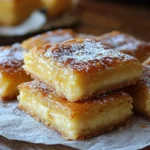
These Gooey Butter Cake Bars are a true classic from St. Louis tradition, made incredibly simple using a cake mix. They feature a buttery cake base topped with a sweet, creamy, gooey filling, delivering big, bold flavor with minimal prep.
- Cook Time: 35 minutes
- Total Time: 35 minutes
Ingredients
Base
- 1 box yellow cake mix (about 15.25 oz)
- 0.5 cup unsalted butter (1 stick, melted)
- 1 large egg (for the base)
Gooey Filling
- 8 oz cream cheese (block, softened)
- 2 large eggs (for the filling)
- 4 cups powdered sugar (confectioners’ sugar)
Instructions
- Preheat your oven to 350°F (175°C). Grease a 9×13 inch baking pan – a standard glass or metal one works great – and give it a good grease. You can use cooking spray or a little butter and flour. This step is crucial so your bars don’t stick!
- In a medium bowl, add the dry yellow cake mix, melted butter, and the first large egg. Mix it all together until it’s just combined. Don’t overmix! It’s going to be a pretty thick, almost dough-like mixture.
- Press that thick mixture evenly into the bottom of your prepared 9×13 inch pan using the back of a spoon, spatula, or clean hands (lightly floured if it’s sticky).
- In a separate, larger bowl, add your softened cream cheese. Beat it with an electric mixer (or a whisk) until it’s super smooth and creamy, with no lumps.
- Add the two large eggs to the cream cheese and beat again until they are just combined.
- Gradually add the powdered sugar, one cup at a time, beating on low speed at first. Once incorporated, beat until the mixture is completely smooth and creamy. It will be thick but pourable.
- Carefully pour this luscious cream cheese mixture right over the cake base you pressed into the pan. Use a spatula to gently spread it out evenly, making sure it covers the base all the way to the edges.
- Pop the pan into your preheated oven. Bake for 30-40 minutes. The edges will look lightly golden brown, and the center should look set but still have a slight wobble or softness. It will firm up more as it cools. Don’t wait for the center to be completely solid.
- You absolutely MUST let these cool completely in the pan before you even think about cutting into them. As they cool, the gooey center sets up just enough to hold its shape when cut. Patience, my friend, patience! It might take a couple of hours.
- Once fully cooled, use a sharp knife to cut them into squares or bars. Dust with a little extra powdered sugar if you like, and get ready to enjoy!
Notes
Store cooled bars in an airtight container at room temperature for 2-3 days, or in the refrigerator for up to a week. For longer storage, freeze cut bars individually wrapped or in a freezer-safe container with parchment paper between layers for up to 2-3 months. Thaw at room temperature or in the fridge. Tips for success: Ensure cream cheese is softened to avoid lumps. Don’t overmix the base. Grease the pan well to prevent sticking. Don’t overbake; the center should still be slightly soft when removed from the oven. Cool completely before cutting for clean slices.